Costume Design Concepts
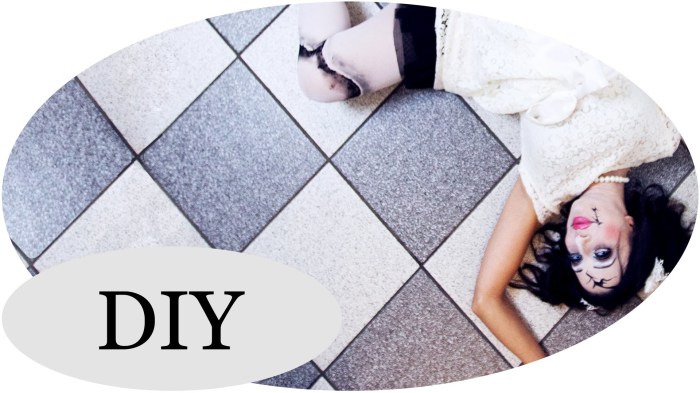
Diy creepy doll costume – Crafting a truly unsettling creepy doll costume requires careful consideration of design elements to achieve the desired level of eeriness. The following concepts offer varying levels of complexity, catering to different skill sets and desired effects. Each design prioritizes a distinct visual aesthetic, achieved through specific material choices and construction techniques.
Creepy Doll Costume Concept 1: Porcelain Doll
This costume aims for a classic, yet unsettling, porcelain doll aesthetic. The overall effect should be one of delicate fragility juxtaposed with a disturbing stillness.The costume consists of a flowing, off-white cotton dress with delicate lace trim. The dress should be slightly oversized and slightly stained with what appears to be dried tea or blood (achieved using fabric paint).
The doll’s face is a crucial element. A pale, almost translucent foundation should be applied to the face, with dark circles under the eyes accentuated with eyeshadow. The lips should be painted a deep, unnatural red. The hair should be long, straight, and styled with a slight wave, possibly using a white wig with strategically placed streaks of grey.
To enhance the porcelain effect, the wearer can incorporate subtle cracks in the makeup around the eyes and mouth.The color palette is limited to off-whites, pale greys, and a stark crimson. The fabric textures are smooth and slightly stiff, mimicking the feel of porcelain. The overall aesthetic is one of unsettling beauty; a doll seemingly frozen in time, yet possessing a hidden darkness.
Creepy Doll Costume Concept 2: Rag Doll
This costume focuses on a more tactile and unsettlingly homemade aesthetic, drawing inspiration from vintage rag dolls. The overall feeling should be one of worn-out familiarity combined with an unsettling sense of decay.The costume utilizes patchwork fabrics of various textures and colors. Think faded blues, muted greens, and browns, all slightly worn and frayed at the edges. The body of the costume can be constructed from a simple burlap sack, with stuffing protruding from seams and holes for a genuinely ragged appearance.
The face is key. Instead of makeup, the face could be crafted from felt or other fabric, stitched with uneven lines and exaggerated features. Button eyes are a must, perhaps mismatched and slightly askew. The hair can be made from yarn or frayed fabric, intentionally unkempt and tangled.The color palette is muted and earthy, with a focus on faded and worn colors.
The fabric textures are rough, uneven, and visibly aged. The overall aesthetic is that of a neglected, almost decaying doll, evoking a feeling of unease and forgotten childhood.
Creepy Doll Costume Concept 3: Victorian Doll
This concept leans into a more gothic and ornate aesthetic, inspired by Victorian-era dolls. The goal is to create a sense of elegant decay, a beautiful doll slowly succumbing to the ravages of time.The costume features a richly detailed, dark velvet dress with intricate lace accents. The dress should be long and flowing, possibly with a bustle or crinoline to create a dramatic silhouette.
The doll’s face should be heavily made up, with dark, smoky eyes and a pale complexion. The lips could be a deep, almost purplish red. The hair should be styled in elaborate curls and waves, perhaps using a dark brown or black wig. To enhance the decay effect, strategically placed “cracks” and “stains” in the makeup and costume are essential.
Consider adding delicate, tarnished jewelry for a final touch of Victorian-era opulence.The color palette is rich and dark, featuring deep velvets, dark lace, and deep reds. The fabric textures are luxurious yet slightly worn, suggesting age and decay. The overall aesthetic is that of a once-grand doll, now showing signs of age and deterioration, creating a sense of melancholic beauty with a sinister undertone.
Dare to be different this Halloween! Crafting a DIY creepy doll costume requires a unique vision, and sometimes that means drawing inspiration from unexpected places. For a truly unsettling effect, consider incorporating elements from a regal yet sinister aesthetic, like the one you’ll find in this fantastic tutorial on a queen of hearts costume diy. Think twisted embroidery, a slightly off-kilter crown, and a palette of unsettlingly vibrant colors.
The result? A DIY creepy doll costume that’s both terrifying and breathtakingly creative.
Prop Creation
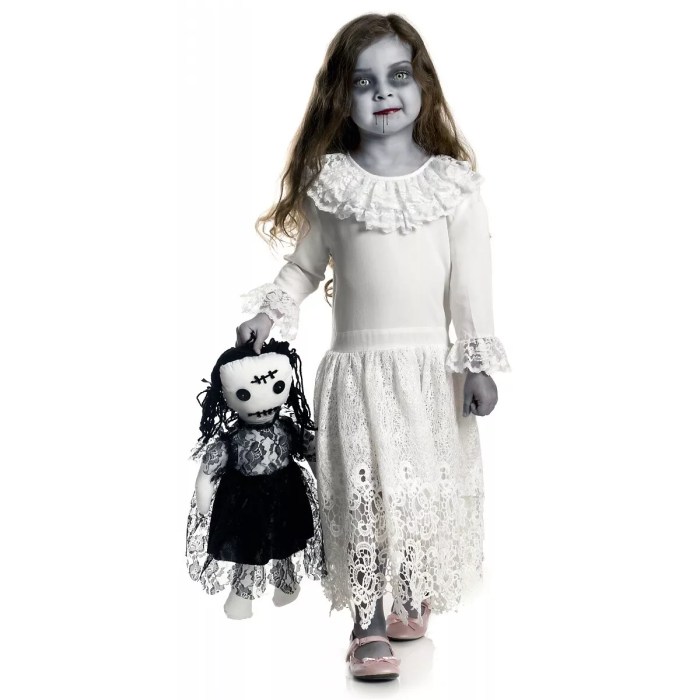
Crafting the perfect creepy doll costume necessitates more than just the attire; unsettling props are crucial to complete the unsettling effect. These additions elevate the costume from simple to genuinely disturbing, transforming the wearer into a truly memorable figure of fright. The following Artikels the creation of three distinct props, each designed to enhance the overall creepiness factor.
Broken Doll Arm
This prop aims to visually represent a dismembered doll limb, adding a visceral element to the costume. The process involves careful sculpting and texturing to achieve a convincingly realistic, yet unsettling, effect.
- Material Gathering: Acquire a sturdy, lightweight material such as foam (preferably EVA foam for its durability and ease of carving), acrylic paints (flesh tones, browns, and blacks), a craft knife, hot glue gun, and possibly some fabric scraps for added realism.
- Foam Shaping: Carve a rough approximation of a doll arm from the foam, paying attention to the proportions and subtle curves of a child’s arm. Aim for a slightly elongated and unnatural shape to enhance the unsettling nature of the prop.
- Detailing and Texturing: Using the craft knife, add fine details such as wrinkles and creases to mimic the texture of skin. Consider adding small imperfections and irregularities to make it look less artificial. A slightly rough texture is more effective than a smooth one.
- Painting and Finishing: Apply layers of acrylic paint to achieve a realistic skin tone. Use darker shades to create shadows and highlight the creases and wrinkles, enhancing the three-dimensional effect. Consider adding a few strategically placed cracks and blemishes for added realism and creepiness. A final sealant can protect the paint and add a slightly glossy finish.
Creepy Toy
This prop could be a small, unsettling toy – perhaps a vintage wind-up toy with a slightly sinister design or a distorted version of a familiar childhood toy.
- Toy Selection: Choose a small, inexpensive toy that lends itself well to modification. Consider a simple, mass-produced toy that can be easily altered. A small plastic animal or a simple car could work well.
- Modification and Distortions: Use a craft knife or heat gun to carefully modify the toy. Slightly distort its features, making them exaggerated or asymmetrical. Consider adding chipped paint or cracks to give it a worn and aged appearance.
- Adding Details: Consider adding additional elements to enhance the creepiness factor. For example, you could add small, strategically placed stains or use acrylic paint to add unsettling details to the toy’s face or body. A little bit of rust or discoloration can also be very effective.
- Finishing Touches: Once the modifications are complete, apply a sealant to protect the paint and add a slightly aged, worn look. This will enhance the overall unsettling effect of the prop.
Disintegrating Doll Head
This prop aims to depict a decaying or disintegrating doll’s head, emphasizing the passage of time and decay.
- Material Selection: Use a readily available doll head (perhaps a damaged or inexpensive one from a thrift store) as a base. You’ll also need plaster of Paris or a similar sculpting material, acrylic paints (whites, grays, browns), and a fine-tipped brush.
- Applying the Sculpting Material: Carefully apply the plaster of Paris or sculpting material to the doll head, creating cracks and fissures to simulate decay. Build up layers to create a textured, decaying surface.
- Painting and Detailing: Once the sculpting material is dry, use acrylic paints to create a decaying effect. Start with lighter shades of gray and white, then add darker browns and blacks to emphasize the cracks and crevices. Use a fine-tipped brush for precision.
- Finishing: Apply a sealant to protect the paint and add a slightly glossy finish to some areas to simulate moisture or decay. Consider adding subtle details such as dirt or grime to enhance the realism.
Costume Assembly and Refinement
The transformation from individual components to a unified, terrifyingly effective creepy doll costume requires meticulous attention to detail and a steady hand. This stage is where the vision truly takes shape, moving beyond mere components to become a chilling whole. Careful consideration of both construction and customization is key to achieving a truly unsettling effect.
The assembly process depends heavily on the specific design chosen, but the underlying principles remain consistent: secure attachment, seamless integration, and the strategic placement of unsettling details. Prioritize comfort and ease of movement while maintaining the integrity of the costume’s unsettling aesthetic.
Securing the Costume Elements
The foundation of a successful creepy doll costume lies in the secure attachment of its various components. Begin by carefully attaching the dress or outfit to the underlying base layer, ensuring a snug fit without restricting movement. Use strong, yet flexible, adhesives or stitching techniques appropriate for the chosen materials. Pay close attention to areas prone to stress, such as seams and joints, reinforcing them as needed with additional stitching or strategically placed fabric glue.
For example, if using a porcelain-like finish, consider reinforcing stress points with a flexible resin to prevent cracking or tearing. Any exposed seams or edges should be neatly finished to maintain a polished, yet unsettling, appearance.
Customizing for Individual Body Types
Adapting the costume to fit diverse body types requires a thoughtful approach. Avoid rigid adherence to a single pattern; instead, embrace the opportunity to personalize the costume. For instance, if the chosen design includes a dress, consider using adjustable straps or elastic waistbands to accommodate varying sizes. Similarly, for a more form-fitting effect, the pattern can be adjusted to accommodate specific body measurements, allowing for a tailored fit that complements the overall creepy aesthetic.
Oversized components, such as sleeves or skirts, can be easily altered to maintain a cohesive appearance, even with significant differences in body proportions. Remember, the goal is to enhance the costume’s unsettling effect, not restrict movement or comfort.
Enhancing Creepiness Through Detail, Diy creepy doll costume
The true power of a creepy doll costume lies in the subtle details. These seemingly insignificant touches elevate the costume from merely “costume-like” to truly unsettling. Consider adding subtle discolorations using fabric paints to create a weathered, aged appearance. Strategic placement of cracks and chips, meticulously crafted using specialized modeling clay or resin, can add a layer of unsettling realism.
Incorporating realistic-looking stitches, perhaps slightly askew or uneven, can evoke a sense of handmade horror. Consider adding details such as chipped paint, or slightly off-kilter buttons and eyes to complete the unsettling aesthetic. The use of strategically placed, slightly mismatched textures also contributes to the overall effect of a truly unsettling, homemade creepy doll.
Common Queries: Diy Creepy Doll Costume
How long does it take to make a DIY creepy doll costume?
The time commitment varies greatly depending on the complexity of your chosen design and your crafting skills. Simple costumes might take a weekend, while more intricate ones could require several weeks.
What kind of glue is best for attaching costume elements?
Hot glue is a quick and effective option for many applications, but fabric glue or even strong double-sided tape might be better choices for delicate fabrics or skin-safe applications.
Where can I find unique materials for my creepy doll costume?
Thrift stores, antique shops, and even craft supply stores offer a treasure trove of unique materials. Consider repurposing old dolls, fabrics, and toys to create a truly one-of-a-kind costume.
How do I make the costume comfortable to wear for extended periods?
Prioritize breathable fabrics, ensure a proper fit, and consider adding padding or lining in areas that might chafe. Take breaks if you’re wearing the costume for a long time.

